Kafka in a Container: A Comprehensive Tutorial for Producing and Consuming Data

1. Introduction
Apache Kafka is a popular distributed streaming platform that allows developers and data engineers to build real-time data pipelines and applications. Docker, on the other hand, is a containerization platform that allows applications to be packaged and run in isolated environments. Together, Kafka and Docker provide a powerful toolset for building efficient, scalable, and portable data processing systems.
In this article, we’ll explore how to produce and consume data from Kafka within Docker. We’ll start by setting up a Kafka cluster using Docker Compose and then show how to produce and consume data to and from Kafka topics using Docker containers. We’ll provide step-by-step instructions and code examples to help you get started, whether you’re new to Kafka and Docker or an experienced developer looking to streamline your data pipeline. By the end of this article, you’ll have the skills and knowledge you need to build your own Kafka-based data processing systems in Docker.
You can find the code in my github repository
2. Setting up Kafka in Docker
Before we can start producing and consuming data from Kafka in Docker, we need to set up a Kafka cluster using Docker Compose. Docker Compose is a tool that allows us to define and run multi-container Docker applications using a YAML file.
- Install Docker and Docker Compose on your machine if you haven’t already.
- Create a new directory for your Kafka cluster and navigate to it in the terminal.
- Create a new file called
docker-compose.ymlin this directory, and add the following code:
---
version: '2'
services:
  zookeeper:
    image: confluentinc/cp-zookeeper:latest
    environment:
      ZOOKEEPER_CLIENT_PORT: 2181
      ZOOKEEPER_TICK_TIME: 2000
    networks:
      - kafka_net

  kafka:

    image: confluentinc/cp-kafka:latest
    depends_on:
      - zookeeper
    ports:
      - 29092:29092
    environment:
      KAFKA_BROKER_ID: 1
      KAFKA_ZOOKEEPER_CONNECT: zookeeper:2181
      KAFKA_ADVERTISED_LISTENERS: PLAINTEXT://kafka:9092,PLAINTEXT_HOST://localhost:29092
      KAFKA_LISTENER_SECURITY_PROTOCOL_MAP: PLAINTEXT:PLAINTEXT,PLAINTEXT_HOST:PLAINTEXT
      KAFKA_INTER_BROKER_LISTENER_NAME: PLAINTEXT
      KAFKA_OFFSETS_TOPIC_REPLICATION_FACTOR: 1
    networks:
      - kafka_net

  kafka-ui:
    image: provectuslabs/kafka-ui
    container_name: kafka-ui
    ports:
      - "8080:8080"
    restart: always
    environment:
      - KAFKA_CLUSTERS_0_NAME=local
      - KAFKA_CLUSTERS_0_BOOTSTRAPSERVERS=kafka:9092
    networks:
      - kafka_net

networks:
  kafka_net:
    driver: "bridge"
The diagram of Kafka docker

In this file, we define two services: zookeeper and kafka. The zookeeper service runs the ZooKeeper server, which is required for Kafka to function properly. The kafka service runs the Kafka broker, which is responsible for receiving and storing messages.
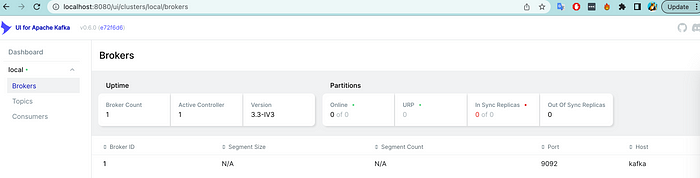
Kafka UI
Kafka UI is a web-based user interface for Kafka that allows you to monitor and manage Kafka clusters, topics, partitions, and messages. It provides a graphical representation of the Kafka data pipeline, making it easy to visualize and debug complex systems.
Kafka UI is typically deployed as a separate service or container alongside the Kafka cluster. It connects to the Kafka brokers using the Kafka REST API or the Kafka JMX interface, and provides a user-friendly interface for interacting with the Kafka cluster.
Here are some of the features you can expect from Kafka UI
- Cluster overview: A high-level view of the Kafka cluster, showing the number of brokers, topics, and partitions.
- Topic management: The ability to create, delete, and modify Kafka topics, as well as view topic metadata and configuration settings.
- Partition management: The ability to view partition details, such as the number of messages, the size of the partition, and the last message offset.
- Message inspection: The ability to view individual messages in a topic, as well as search for messages based on key or value.
- Consumer group management: The ability to view consumer group details, such as the number of consumers, the lag for each partition, and the committed offset.
Save the docker-compose.yml file, and then run the following command in the terminal:
docker-compose up -dVerify that the containers are running by running the following command:
docker ps
3. Producing data to Kafka in Docker
Producing data to Kafka in Docker with Python:
In addition to using the Kafka command-line tools, you can also produce data to Kafka in Docker using Python. This can be useful if you want to automate the production of data, or if you need to integrate Kafka with an existing Python application.
To produce data to Kafka in Docker with Python, we’ll use the kafka-python library, which provides a high-level API for interacting with Kafka. Here are the steps to produce data to Kafka in Docker using Python:
- First, we need to install the
kafka-pythonlibrary in our Python environment. Run the following command in the terminal:
pip install kafka-python2. Next, let’s create a new Python script to produce data to Kafka call producer.py. In the script, we’ll use the kafka-python library to create a Kafka producer and send some messages to a Kafka topic.
from kafka import KafkaProducer
from json import dumps
from time import sleep

my_producer = KafkaProducer(
    bootstrap_servers = ['localhost:29092'],
    value_serializer = lambda x:dumps(x).encode('utf-8')
)

for index in range(500):
    my_data = {'number' : index}
    my_producer.send('testnum', value = my_data)
    sleep(5)
    print(f"Sent data: {index}")
3. Run the following command to execute the Python script:
python producer.py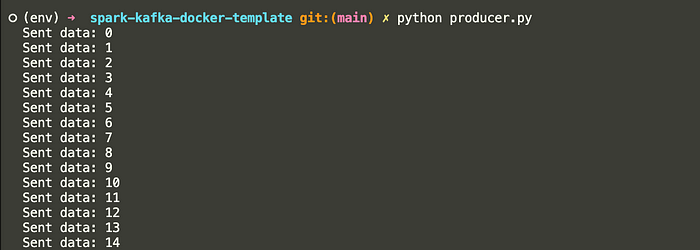
This will run the Python script and produce 500 messages to the testnum topic in Kafka.
Congratulations, you’ve successfully produced data to Kafka in Docker using Python! You can now use this method to automate the production of data or integrate Kafka with an existing Python application.
4. Consuming data to Kafka in Docker
- Let’s create a new Python script to produce data to Kafka call
consumer.py. In the script, we’ll use thekafka-pythonlibrary to create a Kafka producer and send some messages to a Kafka topic.
from json import loads
from kafka import KafkaConsumer

my_consumer = KafkaConsumer(
        'testnum',
        bootstrap_servers = ['localhost:29092'],
        auto_offset_reset = 'earliest',
        enable_auto_commit = True,
        group_id = 'my-group',
        value_deserializer = lambda x : loads(x.decode('utf-8'))
    )

for message in my_consumer:
    message = message.value
    print(message)
2. Run the following command to execute the Python script:
python consumer.py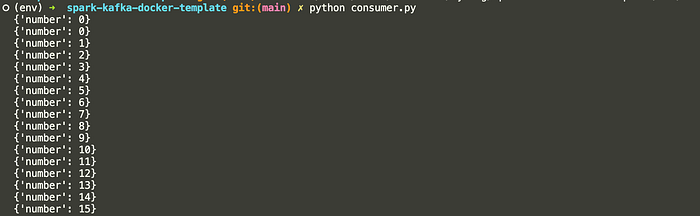
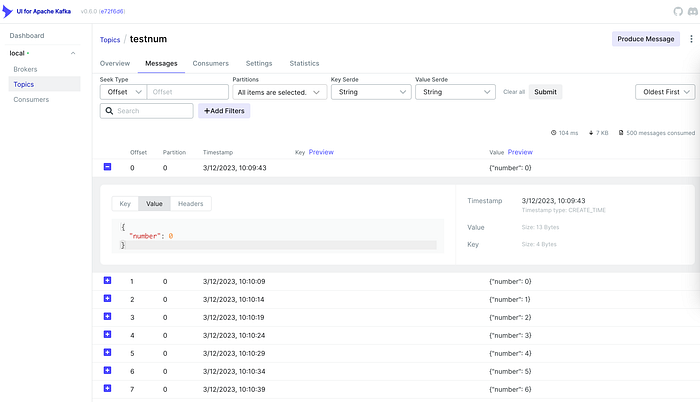
5. View data in Kafka UI
We can also view the raw messages by using Kafka UI
Go to localhost:8080 -> Topic -> message
6. Conclusion
In conclusion, Kafka is a popular distributed messaging system that allows you to reliably transmit data between applications and services. By running Kafka in Docker, you can easily set up a local development environment for testing and debugging Kafka producers and consumers.
In this article, we’ve covered how to set up a Kafka cluster in Docker, produce data to Kafka in Docker with Python, consume data from Kafka in Docker using the command-line tools and Python, and use a Kafka UI service to monitor your Kafka cluster. By following these steps, you should now have a good understanding of how to work with Kafka in Docker, and be able to apply these techniques to your own projects and applications.